Operating Systems. Part 3 — “Installing Arch Linux” 🚀
In the previous episodes we conjured a USB with Arch (or a full Ventoy multi‑boot) and poked a bit of fun at the “GUI‑only” cult 😏
Time to install the best OS of all time, made by humans for humans. Yep, I mean Arch 🖤🐧
🧭 Plan
- Prepare the media and check the network.
- Update
archinstallin the live environment (it’s often outdated on the ISO). - Walk through the installer: disks, btrfs, bootloader, profile, packages.
- Reboot and make GRUB see Windows.
Along the way — screenshots and author commentary, with my signature grumbling here and there 🙃
🖥️ Preparation
-
Write the Arch Linux ISO with archinstall. I’m using Ventoy with a bunch of ISOs (and yeah, two pieces of junk — Windows 10 and 11 — are lying nearby; useful for dual‑boot).
-
If you need dual‑boot, install Windows first — fewer headaches.
-
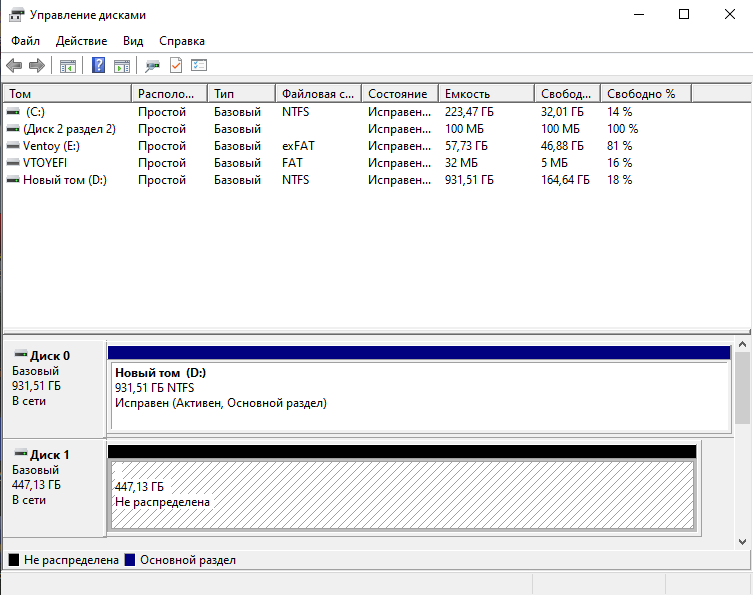
In Windows, open Disk Management and shrink a partition to free space for Arch. If Arch goes to a separate SSD, just leave it empty.
-
Windows must be GPT (not MBR)! If you’re on MBR — convert to GPT:
mbr2gpt /convert /allowFullOS -
Check BitLocker / Device Encryption. Either disable it, or write down the 48‑digit recovery key and keep it handy (like on paper). Otherwise there’s a good chance the bootloader gets locked after installing Arch 🤡
-
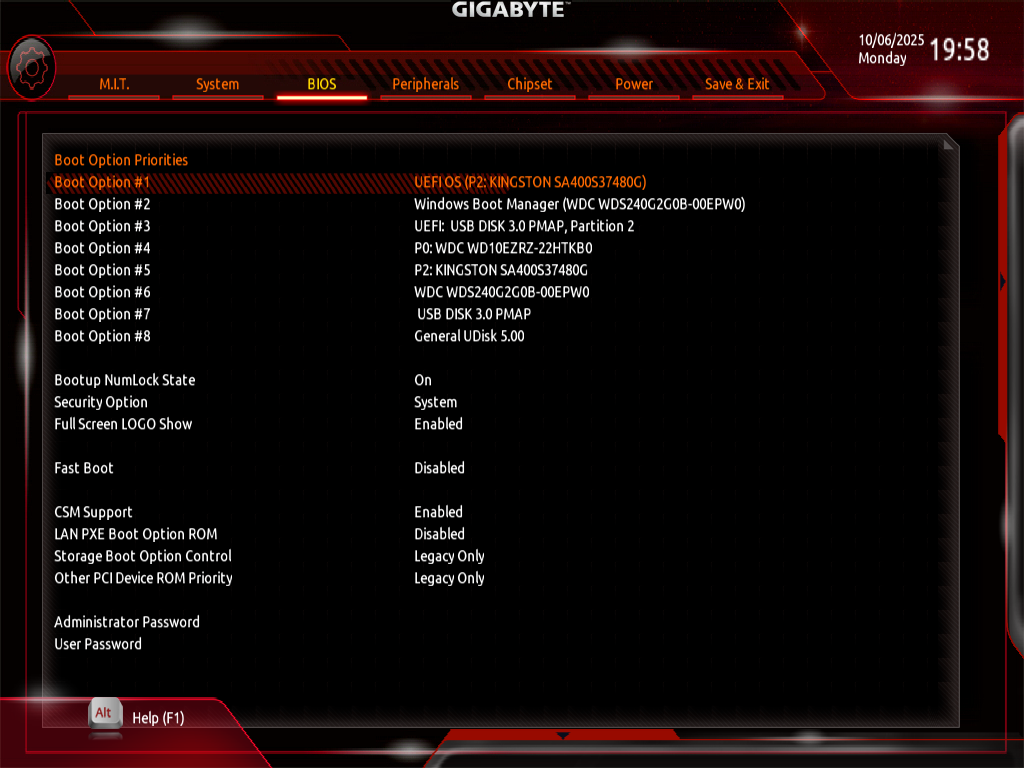
Boot from the USB: pick the USB device in BIOS/UEFI → land in the live environment.

-
archinstall is the official semi‑automated installer for Arch. Sure, you can do it the “proper” manual way — even with a single command — but I’m not a masochist (though after >10 installs, the temptation is real).
-
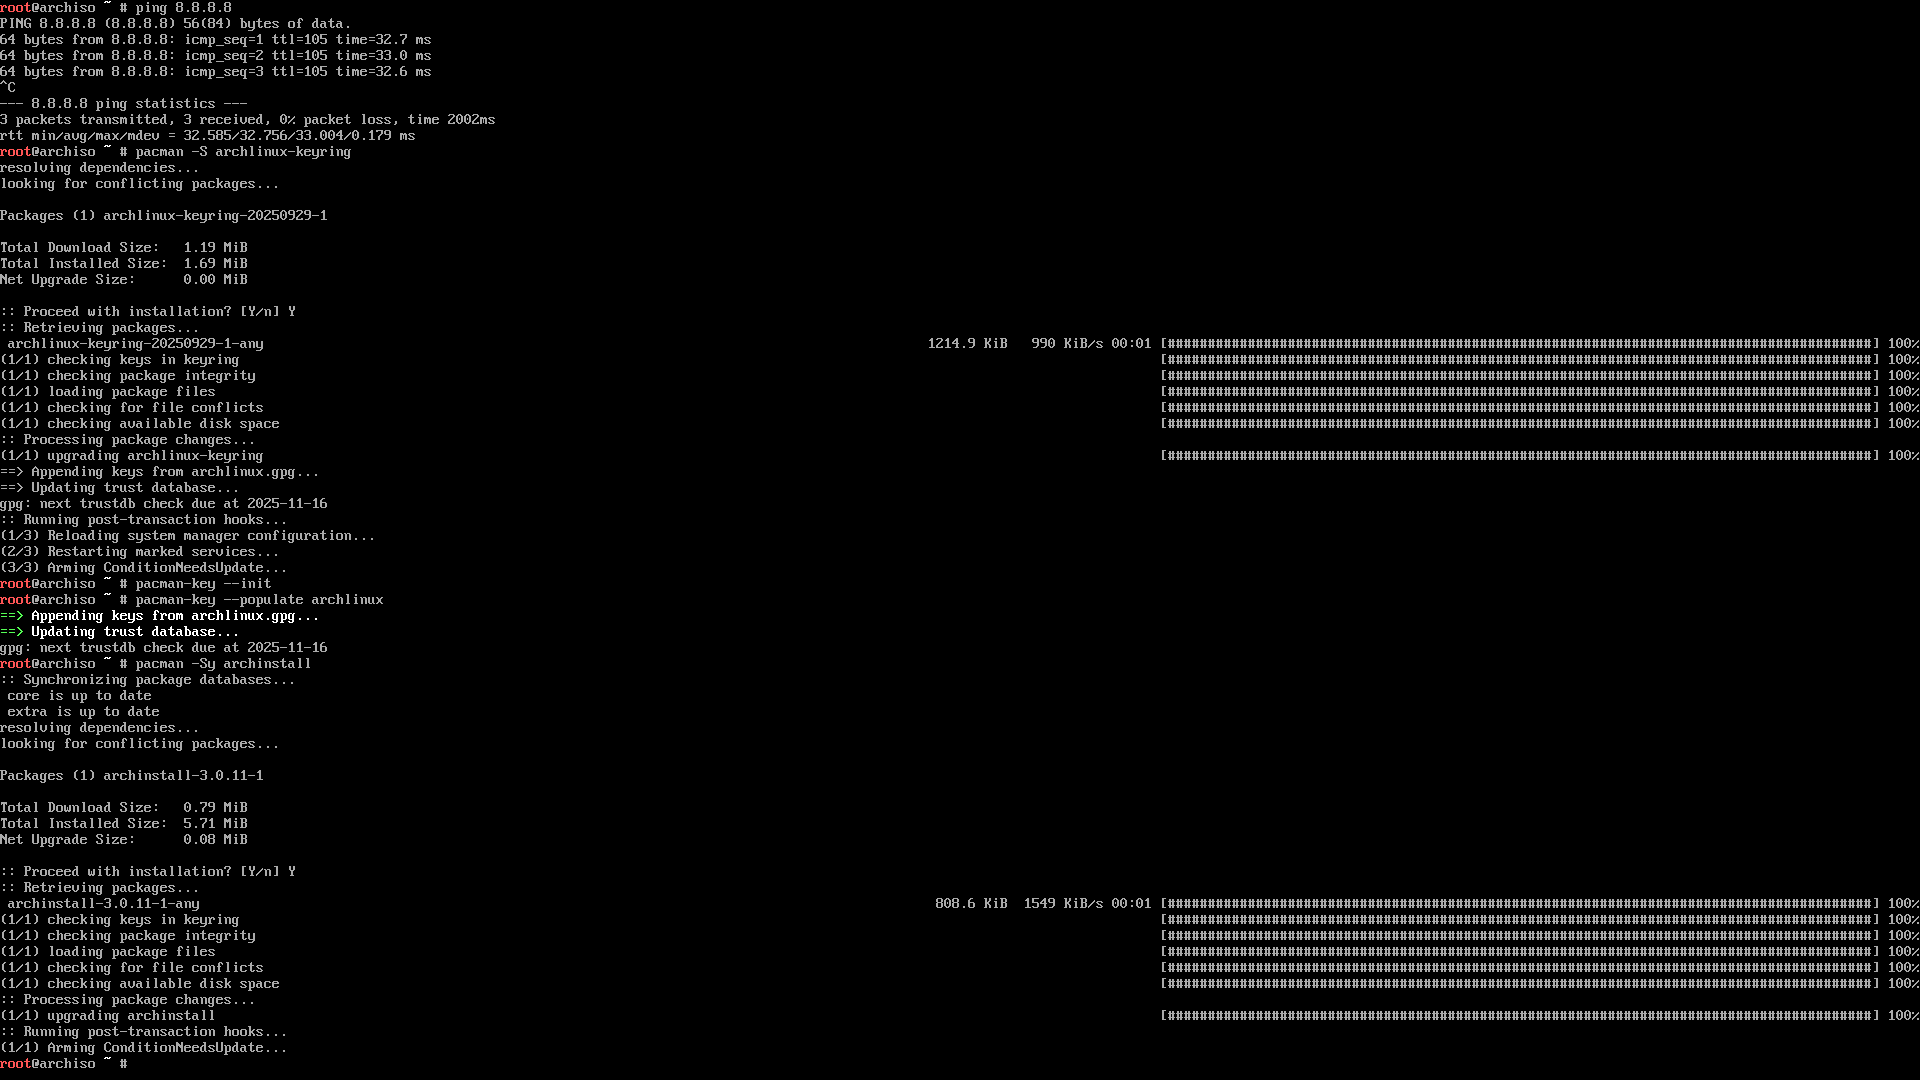
Check the network:
ping -c 3 8.8.8.8If wired works — nice. For Wi‑Fi, hook up via
iwctl:iwctl station wlan0 scan station wlan0 get-networks station wlan0 connect "MyWiFi" --passphrase "supersecret" exit
-
pacman keys (just in case) — initialize and populate:
pacman -Sy archlinux-keyring
pacman-key --init
pacman-key --populate archlinux
Without valid keys, packages won’t install. No packages — no joy 🙂

-
Update archinstall (the ISO version is often ancient):
pacman -Sy archinstallOld versions love to pull non‑existent packages — and you learn that at the very end of install. Who needs that? 😑
-
Start the installer:
archinstall
⚙️ Installation with archinstall
-
Installer language — keep English.
-
Locales — for now, only
en_US.UTF-8. We’ll add Russian after install.
-
Mirrors — pick a region close to you (I used to choose
/Russia).
-
Disk configuration — this is where lives can be ruined. Scenarios:
- Arch only on the disk → Best‑effort default partitioning.
- Two disks (Windows and Arch separate) → choose the empty disk → Best‑effort.
- Single disk dual‑boot → shrink Windows beforehand → in the installer use free space → Manual Partitioning → create the required partitions manually.
For a btrfs setup:
/boot— at least 1 GB (not 100 MB, please!)-
btrfs subvolumes:
@→/@home→/home@log→/var/log@pkg→/var/cache/pacman/pkg@.snapshots→/.snapshots

The screenshot shows the empty Kingston SSD. Hit Suggest partition layout.

Filesystem: btrfs. I’ve been on it for a long time and I’m happy. Theory and tuning will be a separate post. CoW is disabled.

You’ll end up with something like this:

⚠️ This is the trickiest step. It used to ruin installs for me or nuke Windows. Be attentive — read what the installer says.
-
Disk encryption — optional. I leave it off.
-
Swap — enable it. Detailed swap/hibernation tuning — later.
-
Bootloader:
- If Arch is the only OS — use
systemd-boot. - If it’s dual‑boot — GRUB, period. You can tweak
systemd-bootfor dual‑boot, but I’m not eager (burned a whole day — unsuccessfully 😅).

- If Arch is the only OS — use
-
Hostname — anything pleasant. That’s your machine’s name on the network.
-
Authentication — set the root password, create a regular user and grant sudo (archinstall has an option for that). On Linux we work as user, and use privileges consciously.

-
Profile — your initial system selection:
- Desktop → Hyprland (my choice).
- Polkit or seatd — I pick polkit.
- Graphics driver — All open‑source (light side of the Force).
- Greeter — ly (minimalistic).

-
Applications → Audio → PipeWire — choose it, not
pulseaudio(that one’s retired and used to act up for me).Bluetooth — optional, can be configured later.
-
Kernels — I prefer
linux-zenoverlinux. -
Network configuration — “Copy ISO network configuration to installation”. That’s why we checked internet early on.
-
Additional packages — I add
vimto test (because of course). -
Timezone —
UTCis fine (we’ll align Windows/Arch time later). -
NTP (Automatic time sync) — Enabled. Sometimes networks act up and NTP fails — I never figured out why. Try a different Wi‑Fi if needed.
-
Install → Yes and pray to Linus Torvalds.
The disk will be formatted, packages will fly by. Took me 10–30 minutes depending on bandwidth and SSD.
-
If something crashes (and
archinstallis Python, so it happens), read the logs — the installer will offer a command to upload logs and give you a link. Open it in a browser and analyze. -
Done! You can chroot into the installed system right from the installer, drop back to live, or simply reboot. UEFI will have a UEFI OS entry — pick that.
🧰 After reboot: fix GRUB and Windows
-
Boot up. You see GRUB, but only Arch in the menu. Okay, let’s fix it.
-
Log in (ly → user/password). You’ll land in default Hyprland. At the top — a bunch of config errors… it’s fine, we’ll sort it out in the next part. For now, the goal is to bring Windows back to the GRUB menu.
-
Update the system (just in case):
sudo pacman -Syu -
Install and configure os-prober:
sudo pacman -S os-prober
sudo os-prober                 # verify it detects Windows
sudo sed -i 's/^#\?GRUB_DISABLE_OS_PROBER=.*/GRUB_DISABLE_OS_PROBER=false/' /etc/default/grub
sudo grub-mkconfig -o /boot/grub/grub.cfg
Here it should pick up the Windows bootloader.
-
Reboot:
sudo reboot nowCheck GRUB — choose Windows. If it starts — victory 🎉
Result
With archinstall, the setup goes briskly and without voodoo — as long as you’re careful with disks and the bootloader. This guide comes after ~10 Arch installs 😅 (too much pain to fit here) — there were plenty of hiccups, but now you’ve got a beaten path to follow.
I’ve tried Debian, ElementaryOS, Fedora (meh), Ubuntu (meh ×2), i3, GNOME (nope), KDE (also nope). I settled on Arch + Hyprland (via HyDE) — the simplest and most convenient for me. I’m planning to try NixOS (brain‑melter) and CacheOS (Arch‑based).
Thanks for reading! May Arch be with you! ✌️ :3
Next up
In the next article: post‑install Arch Linux setup — software, Hyprland, fonts, layouts, dotfiles.