Operating Systems. Part 1 — “Bootable USB” 🚀
So, we want to install an OS (you know which one, right? 😏).
Plan
-
Plug in a USB drive that will become our boot device.
⚠️ Heads‑up: it will be wiped. Honestly, keep a bunch of USB sticks around. I’ve got six, for example 🙂
-
Format the USB drive.
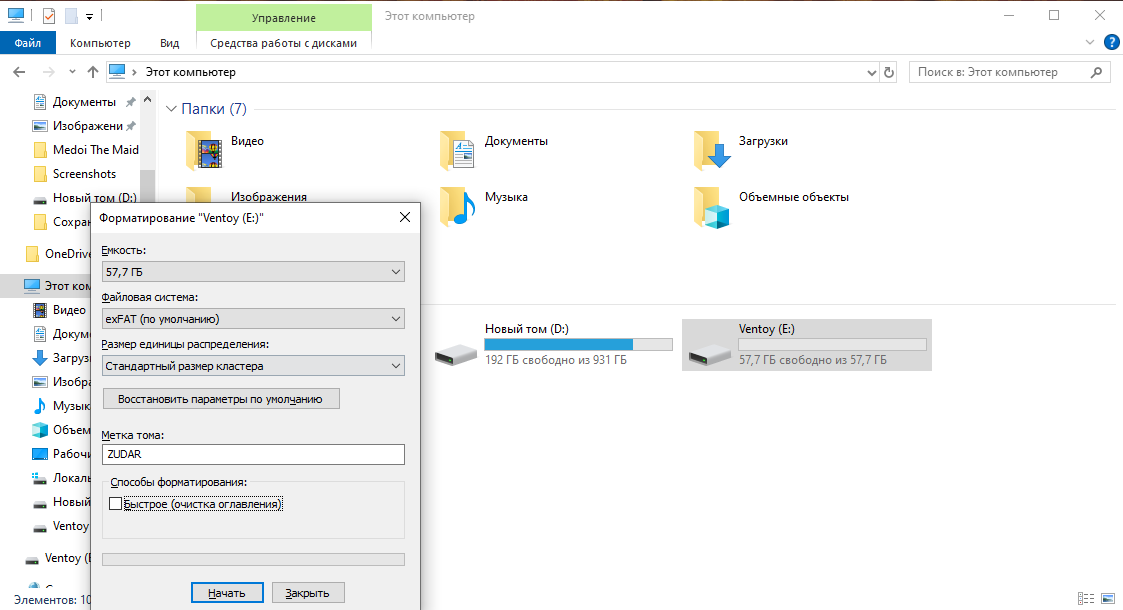
As you can see — that’s Windows. Which makes sense, because the desire to install another OS usually appears while using this piece of junk 💩
Note: Rufus will format the drive anyway before writing, so you can skip this step. But I enjoy deleting data, so I gladly format it a couple more times. Mmm 😈
-
Download the Arch Linux ISO (what else would we use? 😎).
Head to 👉 https://archlinux.org/download/
Remember this site and the Arch Wiki — you’ll need them a lot 🔥
-
Pick a mirror and a download method.
If you want a direct HTTPS link — choose a mirror on the downloads page. For Russia, for example, there’s: 👉 https://archlinux.gay/archlinux/iso/latest/ Or just pick any mirror that’s physically close to you — it’ll be faster. The key point: always grab the latest release, or you can run into package issues. The link above points to the latest build.
-
Install Rufus.
Go to 👉 https://rufus.ie/ Download it. Rufus is a utility for formatting and creating bootable USBs, SD cards, etc.
-
Create a bootable USB with Rufus.
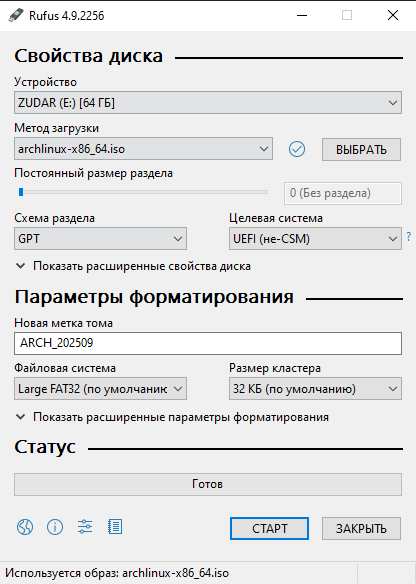
In Rufus, select:
-
Device: your USB drive.
-
Boot selection: the Arch ISO you downloaded.
-
Partition scheme:
- GPT — if you have UEFI (modern PCs/laptops).
- MBR — if you have Legacy BIOS or CSM enabled.
-
File system: FAT32 (works for the Arch ISO).
-
Hit Start and wait patiently. Rufus will prep and format everything for you ✅
I’ve been burned before, so I pick GPT. Sure — for a bootable thumb drive MBR can also work on older BIOS machines. The choice depends on your firmware. I’ll rant about theory later; for now, blind pick is fine — but better aim for UEFI 😉
-
-
Check the contents of the USB.
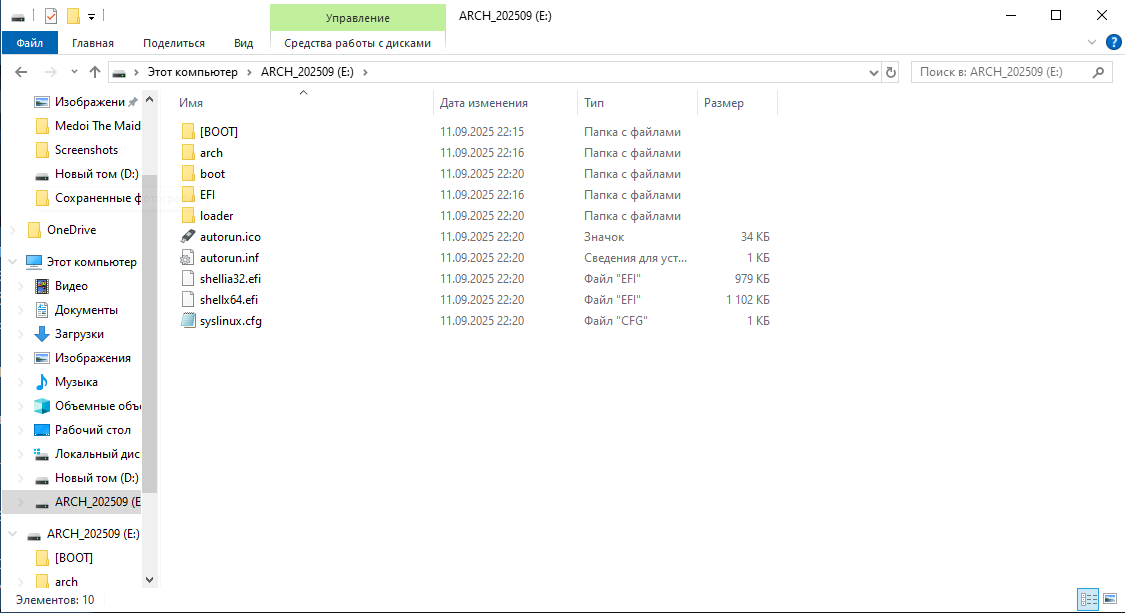
That’s it — the stick is ready. I used to go with MBR, but now let’s verify GPT — let’s be grown‑ups.
-
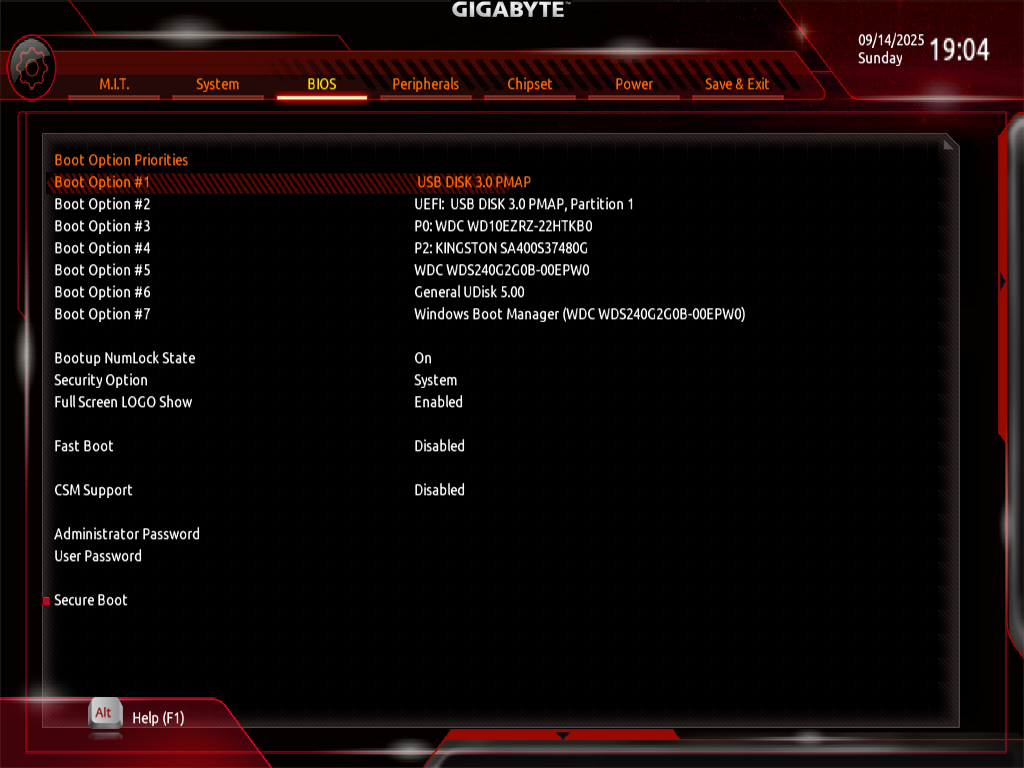
Reboot and enter BIOS/UEFI.
Mash ESC / F2 / F8 / F10 / F12 / Del — depends on the vendor. Choose the USB drive in the boot menu.
If you made GPT + UEFI — disable CSM (Legacy/Compatibility Support) to boot pure UEFI. If you made MBR — the opposite, enable CSM/Legacy.
Some firmware can save screenshots (often F12) to a second inserted USB — handy for guides like this.
-
Boot into the Arch Linux live environment.

The installer shows up — nice! The actual installation will be in one of the next posts 🎯
Now we have a bootable USB you can sneak into your colleague’s PC while they’re out for lunch 🙂 Imagine how happy they’ll be to escape the Windows GUI prison! 😜